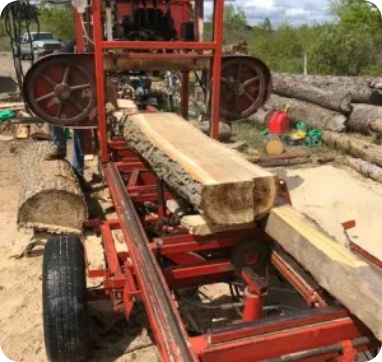
So here we are at a sawmill, milling a fallen local poplar tree. The log is milled to various thicknesses depending on what we will be creating. Most larger tables are milled initially at 3” thick, then off to the kiln to dry where they shrink somewhat and then need to be flattened, planed and basically dressed to allow us to get to work.
Imagination Time!
02
Name Me!
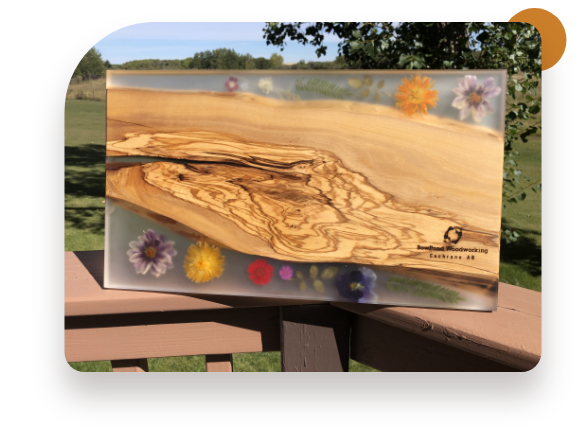
Sometimes the fun of creating is just trying to envision what a raw board could become. This is an 8’ long piece of olive wood. It is very dense and heavy, and incredibly when you work with the wood, it smells so much just like olives! This board became a beautiful coffee table filled with a sea foam translucent resin. It might have been turned into several charcuterie boards, but one of the greatest enjoyments of woodworking is just thinking of all the options and various projects you can create.
Do You Like Yew?
03
What Could We Ever Make Out of This?
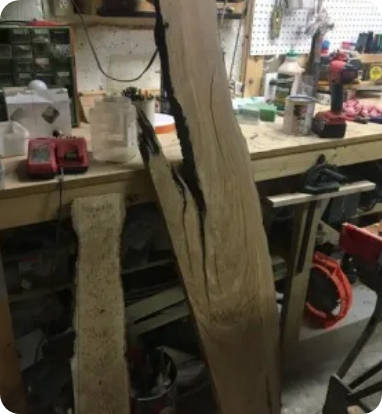
This is a rotted, cracked and crooked piece of yew. This took a lot of work to get it ready to work, but we finally got it all levelled out, then we ripped it in half and created a really unique piece of art showing the colours of the a Green Bay Packers!
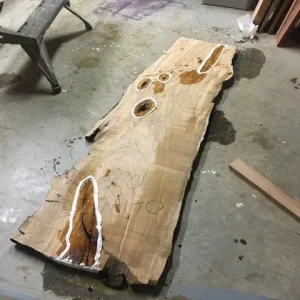
Manitoba Maple Burl
04
This is a slab from a Manitoba Maple log with all kinds of burls along the edges. After levelling it out on a router sled jig, we ripped it half then created a lovely coffee table and matching end table. When the slab is planed it reveals all the amazing features of the wood including the burl and the pink streaks throughout the wood. Start to finish on this was just over 3 months, but well worth it!
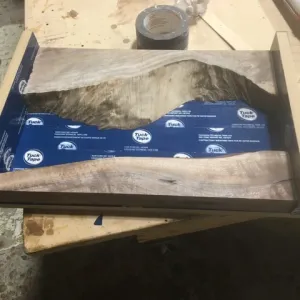
Resin Mold.
05
Beginning Of A Small Board.
Before we pour the resin to create a board, we build a mold. It’s essentially a waterproof box, where the pieces of the wood are cut to fit, then clamped down and filled with resin. It will sit for about 5 days to cure and then the mold is removed.
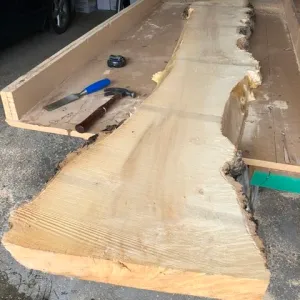
Repair Work
06
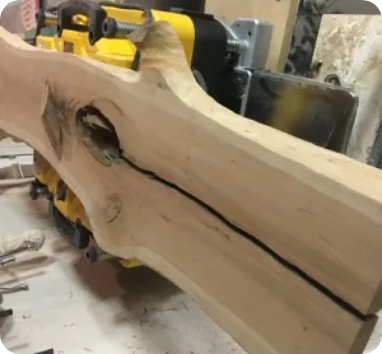
Often, before we can work with a piece of wood, we need to fill all of the cracks, holes and defects. In this case resin was poured into the piece and after it cured, the next step was to plane it to a level surface and then we began making a table.
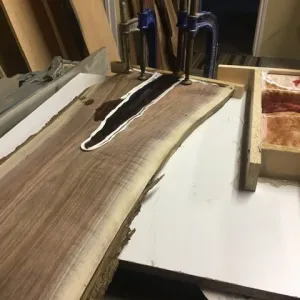
More Repairs
07
Again, this is a piece of walnut that needed some loving care before we could proceed with using it. The wood needs to be stabilized before moving ahead because often the crack will continue to expand unless checked before.